We love store-bought marshmallows as much as the next person, but there is simply nothing like homemade marshmallows. They are pillowy soft, you can cut them into any shape to suit any occasion, and there’s a light crunch right before you hit the soft and sticky goodness.

Homemade Marshmallows
If you’ve never made homemade marshmallows before, I urge you to try and to begin with this recipe! Nothing tastes better than homemade. With this marshmallow recipe, you can customize it so many ways! I love to use a cookie cutter to cut out shapes that my kids love. We make hot chocolate a lot and with this homemade marshmallow recipe, I can cut out the shapes of their initials and personalize each and every cup! The kids love it and I think it gives it just a little special touch! We will do Christmas tree cutouts, snowflakes, flowers, you name it. You can also cut them very small for mini marshmallows.

Marshmallows from Scratch!
Using them in hot chocolate is kind of a no brainer. You can also use these for making homemade rice crispy bars, or just in everyday baking, or even over the campfire! Our house is known for its evening campfire, and there is nothing better than a homemade marshmallow, crisped to a perfect golden brown. I know some people like it completely charred, but those are not my people:) . Kidding of course, to each their own!

How to make Homemade Marshmallows
Have you ever wanted to make homemade marshmallows but were intimidated by the candy thermometer? Here are a few tips on how to achieve “soft ball” stage without one!
Heat the mixture as directed. While it’s coming to a boil, set a medium-sized bowl of ice water and a small metal spoon (your everyday silverware spoon) next to the stove. When the mixture has been bubbling for a few minutes, do your first test.
Dip the spoon into the mixture and coat the tip. With one hand, dip the coated spoon immediately into the ice water and then grab the cooling sugar mixture with your other hand. Remove from the water and roll it around between your fingers and thumb and see what it feels like. If you’re looking for the “soft ball” stage, it should form a ball that holds together but still feels a little squishy and can be flattened when you press on it. (like a gooey caramel)
This process will take a few tries at least, but you can see (and feel!) it moving through the stages to give you an indicator of how close you are. This is just a really fun science experiment in your kitchen! 🙂

Homemade Marshmallows
Ingredients
- 2 teaspoons vanilla extract
- ½ cup water
- ¼ teaspoon cream of tartar
- 3 tablespoons unflavored gelatin
- 1 cup real maple syrup
- pinch of kosher salt
- confectioners' sugar,
Instructions
- Spray an 8×8-inch baking pan with cooking spray, and coat with powdered sugar.
- In the bowl of a stand mixer on low speed, stir together the vanilla, water, and cream of tartar. Turn the mixer off and sprinkle the gelatin and without stirring, let sit.
- Fit a small saucepan with a candy thermometer. Add the maple syrup and salt. Heat over medium heat, stirring frequently, until the temperature reaches the soft ball stage. (If you do not have a thermometer, see notes on how to achieve soft ball stage without one)
- Add the hot maple syrup to the gelatin mixture and fit into the stand mixer with the whisk attachment. Begin at low speed and gradually work up to high speed. Once at high speed, whisk until stiff peaks form, about 10 minutes.
- Transfer to the prepared baking pan and sprinkle on a layer of powdered sugar. Cover with a clean tea towel and let sit for 3 to 4 hours to set.
- Place powdered sugar into a small bowl and cut the set marshmallow slab into your preferred sizes. Dredge each cut marshmallow in the powdered sugar, making sure to coat the cut sides.
- Best eaten fresh, but can also be enjoyed the day after if left uncovered.
Did you make this recipe?
You can tag me at @iamhomesteader.
Photography by The PKP Way.
Did you make Homemade Marshmallows?
I want to hear about it! Take a picture and tag me on Instagram or on Facebook. I would love to see your finished product! Make sure to tag me @iamhomesteader or hashtag #iamhomesteader, or both!
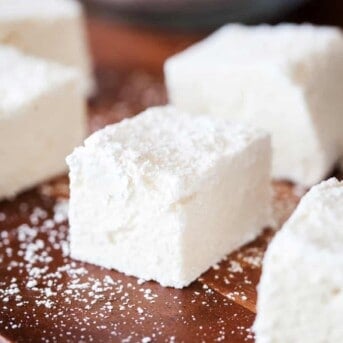
How could the marshmallows in the picture be the ones in this recipe when they are so white? You used maple syrup which makes them brown.
If they used grade A Amber then it wouldn’t be brown, just ecru in color, and the maple flavor would be mild. I like maple, so I’m going to use B grade robust maple syrup, so mine will be a darker tan, and a definite maple flavor
Wander if you could use these when making Rice Krispy Treats?
YUM!!! These sound DELICIOUS AND LOOK DELICIOUS AS WELL!!!!
I tried this but did not care for the maple flavor and beige colored marshmallows
My sister is a vegetarian is there vegetarian gelatin that I could use
Is there any gelatin like that? Or Kosher?
Hi I am new
Is there a substitute for the maple syrup if you’re not a fan of that flavor? My mom used to make a fluffy frosting and made the syrup with sugar that she beat into egg whites. Would that work?
Yes corn syrup
Love it ,will try the recipe.