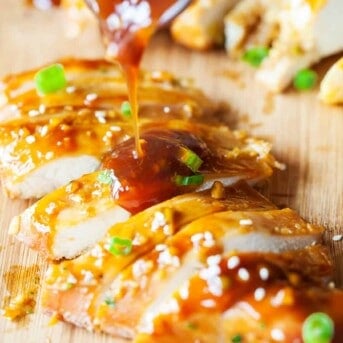
Grilling season simply cannot be complete without the flavor and aroma of beer can chicken. If you have never tried this amazing grilled recipe, today is the day for this perfectly seasoned and juicy chicken! If you are looking for more grilling recipes, make sure to check out my Hawaiian chicken kebabs too!

Beer Can Chicken
Grilling season is upon us and it is my families favorite time of year. We hibernate for so long during the winter that as soon as the season allows it, we have the grill out of hiding and running non-stop. We make the staples like classic grilled cheeseburgers, but we also like to make things a little more interesting with recipes like surf and turf kebabs with chimichurri sauce. In the interest of keeping the grilling menu exciting, we decided to try out hand at a beer can chicken. The results were no disappointment around here!

Beer Can Chicken Recipe
This recipe seems a little complicated, but I swear it isn’t. The ingredients are pretty basic. You will need a whole 5-pound chicken, some beer in a tall can, a little oil, and a slew of various spices.

What is the Purpose of the Beer?
Moisture. During the grilling process, the beer in the can will steam (which is why you want the can half full). The steam adds moisture to the inner cavity of the chicken. The vapor penetrates the skin and adds flavor to the chicken as well. Also, because the chicken is held upright by the can of beer, the fat from the chicken drains and allows the skin to cook evenly.
Does the Type of Beer Matter?
I always recommend any time you are cooking with alcohol to use the drink you like the most. However, in this scenario, the flavor of the beer will affect the end result, but it is very subtle. Since the difference is so minimal, I would not recommend spending an arm and a leg on expensive beer. Go with what you already have on hand.

How to Make Beer Can Chicken
The grill should be preheated with all burners running to medium-high heat. You will eventually turn one burner off, but not until right before cooking.
Spice Rub
Combine all of your spices in a bowl and then add the oil and mix it all together to create a chicken rub. Use this to coat the chicken (make sure you have patted it dry first) on the outside skin and in the inside cavity. The entire chicken should be covered in all areas.
Disposable Pan
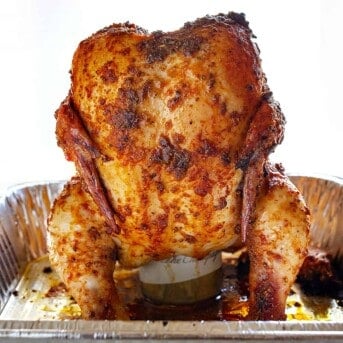
Open up your beer, take a few swigs (or dump about half of it…gasp), and set it upright in the center of the pan. Lower the open cavity of the seasoned chicken onto the open can of beer.
Grill
Reduce the grill heat to medium and shut off one burner. Carefully place the pan of chicken over the off burner for indirect heat cooking. Close the lid and don’t open it again for about 45 minutes. Seriously, I know you will be tempted, but leave it closed. Make sure to keep an eye on the temperature inside of the grill. You want it to maintain a constant temperature of 325-350°F. Let it cook a little longer, at 1 hour and 15 minutes, check the internal temperature of the chicken. It should be at 165°F. Turn the burners up to high and crisp the chicken for another 10 minutes.
Serve
This step requires that you be extremely careful. It is really hard to enjoy chicken with burnt fingers. To properly remove the chicken without burning yourself or others, use oven mitts to lift the pan off of the grill (being careful not to spill any accumulated juices). Give it about 10 minutes of rest time before you lift the chicken off of the can. Remember that the can is half full of hot liquid. To remove the can, use your oven mitts or a kitchen towel to hold the bottom of the can steady, and slowly lift the chicken off (wiggling back and forth if necessary). If you have another person handy, you might want to have them hold the can (with mitts) so that you can pull the chicken off.

Tools Needed to Make Beer Can Chicken
You don’t need any fancy tools to make beer can chicken. Just a disposable pan and a half-empty can of beer. Granted, with this method, balance is key. If you do decide that you will be becoming a beer can chicken grilling champion, maybe investing in a beer can chicken holder wouldn’t be such a bad recommendation. If not, just stick with a pan and a can.

More Chicken Recipes

Beer Can Chicken
Equipment
- 8×10 disposable pan
Ingredients
- 1 can beer, half-full, room temperature
- 5 pound whole chicken, neck and giblets removed
- 2 tablespoons vegetable oil
- 1 teaspoon cumin
- 2 teaspoons garlic powder
- 2 teaspoons onion powder
- 2 teaspoons kosher salt
- 1 teaspoon paprika
- 1 teaspoon oregano
- 1 teaspoon cayenne pepper
- ½ teaspoon ground black pepper
Instructions
- Preheat gas grill to medium-high heat.
- Pat chicken dry with paper towels.
- In a small bowl, combine oil, cumin, garlic powder, onion powder, kosher salt, paprika, oregano, cayenne pepper, and black pepper. Thoroughly coat the outside and inside cavity of the chicken.
- Place half-full beer can (opened) into the disposable pan.
- Lower chicken onto beer can so that the chicken is sitting upright.
- Turn off one grill burner and place the chicken over this area, for indirect cooking.
- Reduce the grill heat to medium and maintain a temperature of 325° to 350° F.
- Allow the chicken to cook with the lid closed. (Do not open up the lid for at least the first 45 minutes while the chicken is cooking.)
- At 1 hour and 15 minutes, use a thermometer to check the temperature. Insert the thermometer into the thickest part of the chicken, without touching the bone, the thermometer should read 165° F.
- Turn the grill heat up to high and allow the chicken crisp for 10 minutes longer.
- Carefully transfer the chicken out of the grill and allow it to rest 10 minutes.
- Carefully lift the chicken off the beer can.
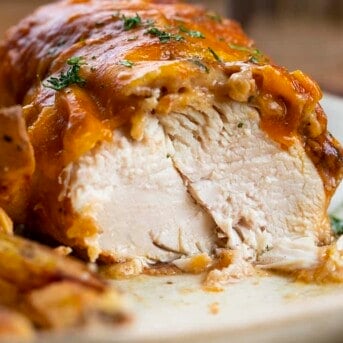
- Cut chicken into pieces and serve immediately.
Notes
Did you make this recipe?
You can tag me at @iamhomesteader.


Excellent
I am dying to try this soon! I just had to write you Amanda, to remark on how wholesome & cute you are!!!!! LOVE YOUR RECEIPES!!!
Thank you so much, Gina!
I made mine in the oven since I don’t have a gas grill. It turned out wonderful!!!
Question, at step 8 it says to:
Allow the chicken to cook with the lid closed, undisturbed for at least 45 minutes.
Then step 9 it says:
At 1 hour and 15 minutes, use a thermometer to check the temperature. Insert the thermometer into the thickest part of the chicken, without touching the bone, the thermometer should read 165° F.
Between the steps is the temperature supposed to remain at 350 degrees?
Hi, Debbie! I work with iamhomesteader and am happy to help with questions. Leaving the lid closed throughout the first 45 minutes of cooking time is a reminder not to be tempted to check on the chicken too early. After 45 minutes, you may check on it, but it will probably not be fully cooked to an internal temperature of 165°F. Thus, the hour and 15-minute cooking time suggestion. As for the grill temperature, yes, keep the temperature at 350°F until the final 10 minutes of cooking, when you increase it. I hope this helps clarify the instructions. Have a great day!
I was cooking on my oven .hope coming goos
I tried to subscribe but it said there was something wrong and the page was missing
Can it be done with a charcoal grill the same way?
The recipe I had was for the grill,but I made mine in the oven. If you have a meat thermometer you could do it outside.165 and and you could keep the coals up with that. I also put bacon in the neck. I used a pop can not a tall can. 2/3 C in the can and garlic.
That’s what I wanted to ask… If it could be done in the oven?
I make this lots my grandkids love when I put lemon pepper delicious