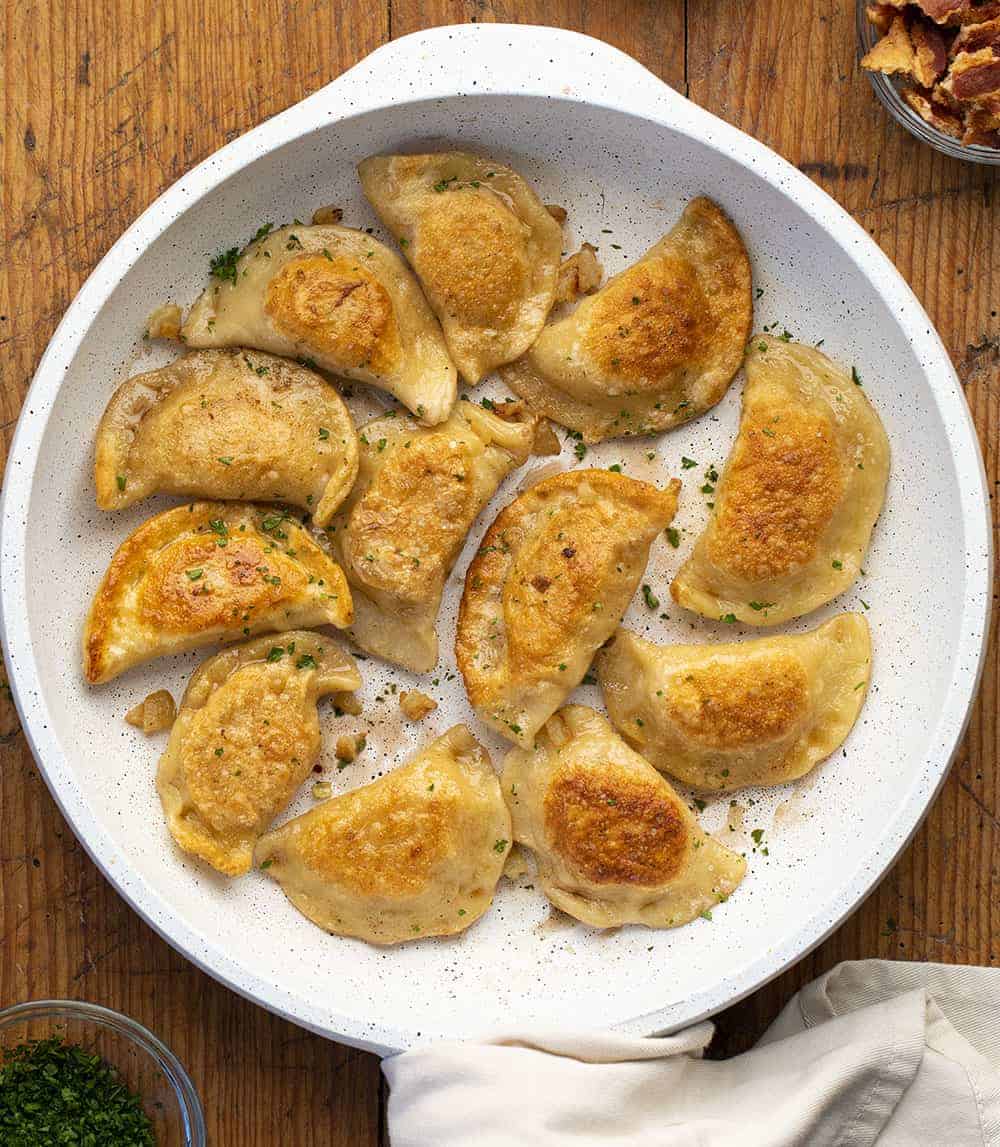
Pierogi are stuffed dumplings that are filled with cheesy mashed potatoes and onion, boiled and then fried in butter, topped with bacon, more onions, and sour cream. Try my Pork Potstickers Recipe for another stuffed and fried dumpling.

Pierogi
Pierogi, sometimes spelled perogi, are filled dumplings that can be traced back hundreds of years. The term first appeared in a Polish cookbook back in the 17th century, but the exact origin of the original recipe is debatable. This pierogi recipe is a basic recipe with the classic potato and cheese filling. Once you get the hang of making them, it’s fun to add your favorite fillings to the dumplings, from savory to sweet.
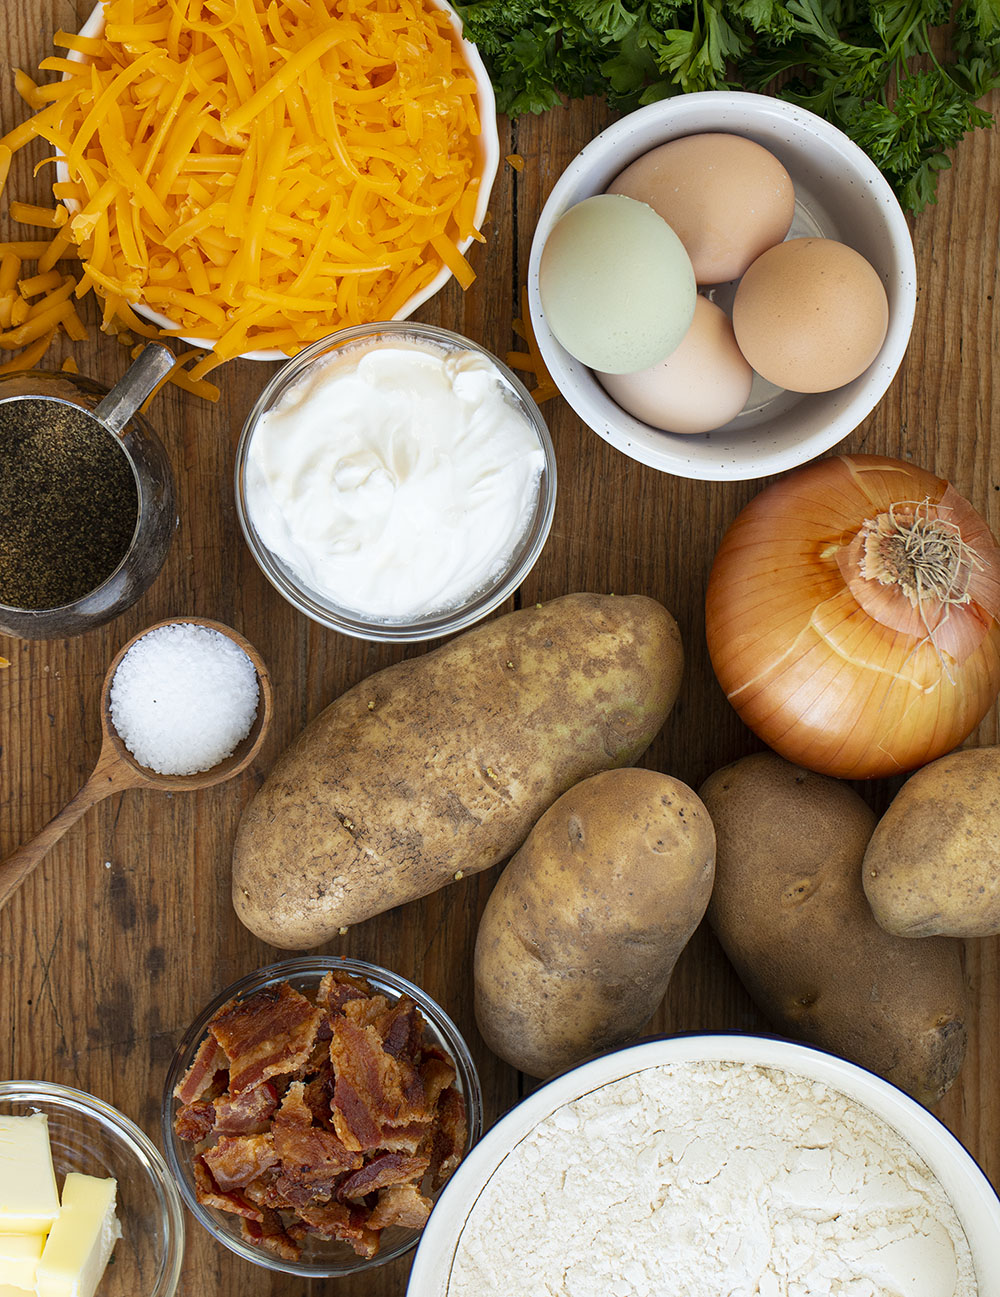
Pierogi Ingredients
There are no surprise ingredients in this recipe. In fact, you may have all the ingredients you need on hand. And, the nice thing about pierogi is that you can double the batch and freeze to enjoy later.
Potatoes: I used russet potatoes for this recipe because they have less moisture and are higher in starch. Be sure to rinse them well before peeling and cutting them into cubes.
Cheese: Using sharp cheddar will give you more flavor. But, you can use your favorite kind of cheese.
Bacon: Cook the bacon ahead of time to save some time and to use as a topping. I prefer to bake bacon. Just place bacon on a baking sheet lined with aluminum foil and bake for 18-20 minutes at 415°F.
How to Make the Filling
To make the filling for the Pierogi, first, saute the onions. As the onions are cooking, fill a large pot with salted water and bring to a boil. Add the potatoes to the pot of boiling water and cook them for about 15 minutes. They should be fork-tender. Before draining the water, reserve a cup of it and set it aside.
Next, drain the rest of the potato water and put the potatoes back in the pot. Add the cheese, sauteed onions (reserving a couple of tablespoons for the topping), salt, and pepper. Mash all the ingredients together until you have all the ingredients combined. Store the potato mixture in the refrigerator to chill as you prepare the dough.
How to Make the Dough
To make the dough that will hold the potato filling, first, whisk the egg in a large bowl. Next, pour in the reserved potato water, oil, and salt. Gradually add the flour, kneading the dough with your hands after each cup of flour has been added. If the dough is too sticky, add a little bit of flour; if too dry, add a bit of water. Wrap the dough in plastic wrap to let rest on the counter for 20-30 minutes.
How to Make Pierogi
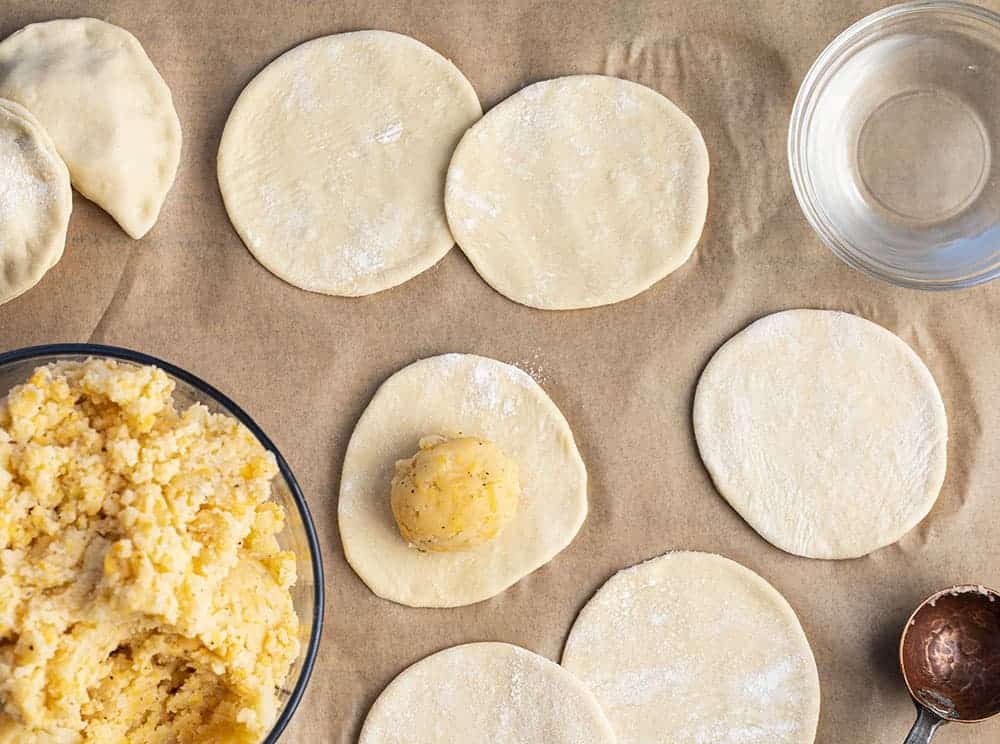
Once the dough has rested and the filling has been removed from the refrigerator, it’s time to get the dumplings assembled, boiled, and fried. To get started, line a baking sheet with parchment paper and set it aside. Lightly flour a work surface and roll out the dough to about 1/8-inch thick. Cut the dough into circles using a cookie cutter, pierogi cutter, or a glass.
Filling Pierogi:
- Dip your finger into water and rub the water around half the edge of a dough circle.
- Place 2-3 teaspoons of the potato filling in the center of the dough.
- Fold the circle over, creating a half-moon shape. Seal the pierog by pinching it shut with your fingers or using a fork. Make sure there are no open gaps.
- Place the sealed dumpling on a lined baking sheet.
- Repeat this process for the remaining pierogi. (I was able to make 33 out of this batch, but it depends on the size of your dough circles.)
Boiling and Frying Pierogi:
- After all the pierogi have been filled, boil a large pot of heavily salted water.
- Working in batches, boil them for 1-2 minutes while stirring (so they don’t stick together). It will take 1-2 minutes for them to float to the top.
- Set the boiled pierogi aside as you boil the rest.
- When ready, melt a tablespoon of butter in the frying pan over medium heat.
- Add a single layer of pierogi into the saucepan. Do not let them touch. Fry for 1-2 minutes per side, or until they are golden brown. Finish with the remaining boiled pierogi.
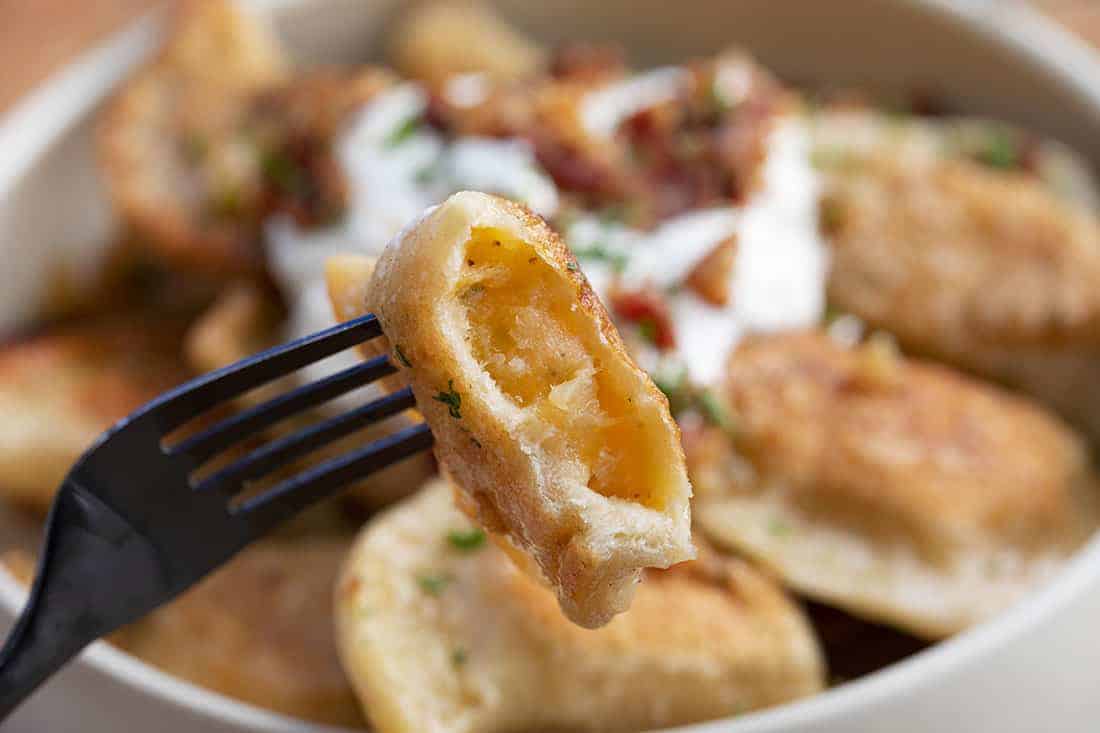
- Serve with toppings like bacon, reserved sauteed onions, sour cream, and parsley.
How to Freeze Pierogi
This recipe is easy to double, and since pierogi is time-consuming, go ahead and make more to freeze and enjoy later. If you are freezing pierogi, follow the instructions up to boiling them. After you boil the pierogi, let them cool on a parchment-lined baking sheet.
Place the baking sheet in the freezer and freeze until the pierogi are solid. After that, transfer the pierogi to a freezer-safe container. Label and date the container(s) and store for up to 6 months. When you are ready to serve the pierogi, let them come to room temperature before frying them in butter.
More Pasta Dishes

Pierogi
Ingredients
FILLING
- 3 tablespoons butter, divided
- 1 small yellow onion, diced (approximately 1 cup), reserving 2 tablespoons for topping
- 2½ pounds (about 4 large) russet potatoes, washed, peeled, and cubed
- 8 ounces sharp cheddar cheese, grated
- 1 teaspoon salt
- ½ teaspoon pepper
DOUGH
- 1 large egg, room temperature
- 1 cup potato water
- 2 teaspoons vegetable oil
- ½ teaspoon kosher salt
- 3 cups all-purpose flour
TOPPINGS
- 2-3 slices bacon, cooked and crumbled for garnish
- reserved onions, for garnish
- sour cream, for garnish
- parsley, for garnish
Instructions
FILLING
- In a medium frying pan, melt 2 tablespoons of butter over medium heat.
- Add onions and cook until tender and translucent (about 8-10 minutes).
- Meanwhile, fill a large pot with salted water and bring to a boil.
- Add cubed potatoes and cook until fork tender (15 minutes).
- Reserve 1 cup of potato water and set aside.
- Drain the remaining water and place potatoes back into the pot. Add cheese, sauteed onion (reserving 2 tablespoons for topping), salt, and pepper. Mash all ingredients until smooth and well combined.
- Set filling in the refrigerator to chill while you prepare the dough.
DOUGH
- In a large bowl, whisk the egg. Add in potato water, oil, and salt.
- Gradually add flour, 1 cup at a time, kneading the dough in the bowl with your hands until all ingredients are well combined. (Add a little bit of flour if the dough is too sticky, and water if the dough is too loose.)
- Wrap the dough ball in plastic wrap and let it rest on the counter for 20-30 minutes.
ASSEMBLY
- Line a baking sheet with parchment paper and set aside.
- When ready, lightly flour a work surface and roll out the dough until it is about 1/8-inch thick.
- Cut the dough into a circle shape, using a round cutter (i.e. a cookie cutter, pierogi cutter, or a glass).
- Fill a small bowl with water. Working one pierog at a time, dip your finger in the water and wet half the edge of a dough circle.
- Spoon 2-3 teaspoons of the potato filling into the center of the circle. Fold the edges together (creating a half-moon shape), and seal the edges with a fork or pinching with your fingers. (Make sure there are no open gaps.)
- Place the sealed pierog on the parchment-lined baking sheet while you prepare the remaining pierogi.
PREPARE
- Bring a large pot of heavily salted water to a boil.
- Working in batches, add the pierogi (about 10 at a time) to the boiling water and cook (gently stirring so they don't stick) until they float to the top (1-2 minutes).
- Remove the boiled pierogi from the water and set them aside. (Stop after this step if you are planning to freeze the pierogi.)
- In a medium frying pan, melt the remaining tablespoon of butter.
- Working in batches, add boiled pierogi in a single layer. (Be careful to not let them touch or they will stick together.) Cook 1-2 minutes per side, or until golden brown.
- Serve immediately topped with bacon, reserved onions, sour cream, and parsley.
FREEZING PIEROGI
- If freezing pierogi, place the boiled pierogi (do not fry in butter) on a baking tray in a single layer and transfer to the freezer. Once frozen, transfer them into freezer-safe containers for up to 6 months (remembering to label and date the containers). When you are ready to eat them, bring them to room temperate and then fry them in butter.
Did you make this recipe?
You can tag me at @iamhomesteader.





This looks soooo good ! Like they will taste amazing.
Absolutely the best pierogi recipe we have ever tried. We’ve made these many times. They freeze well. The hardest part is not eating the innards while you’re preparing them.
I am from the Pittsburgh area and Pierogi’s were a staple in our home. These sound similar to our bur we put a lot more butter and fried onions on top.
My great grandmother would stay with us, on the farm, for a couple of weeks and she would make these for us. She taught my Mom, who taught my sister and I and I taught my youngest daughter. When I go to Wash state to visit my daughter and family, we make these. My son-in-law is norwegian and loves these and he does all the frying, my daughter rolls them out and I fill them. Of course, we make about 3-4 batches so we can freeze and they can eat later. One thing different in our recipe, we don’t pre-cook the onions and we don’t use any oil. The next time we make these, we will try your version. I think the oil helps stretch the dough so it doesn’t tear as easily. Thank you for sharing your recipe. By the way, I am 74 so i have been eating these for a long time, and love every minute of it.
Thanks For Sharing this Amazing Recipe. My Family Loved It. I will be sharing this Recipe with my Friends. Hope They will like it.
I am definitely going to try this.