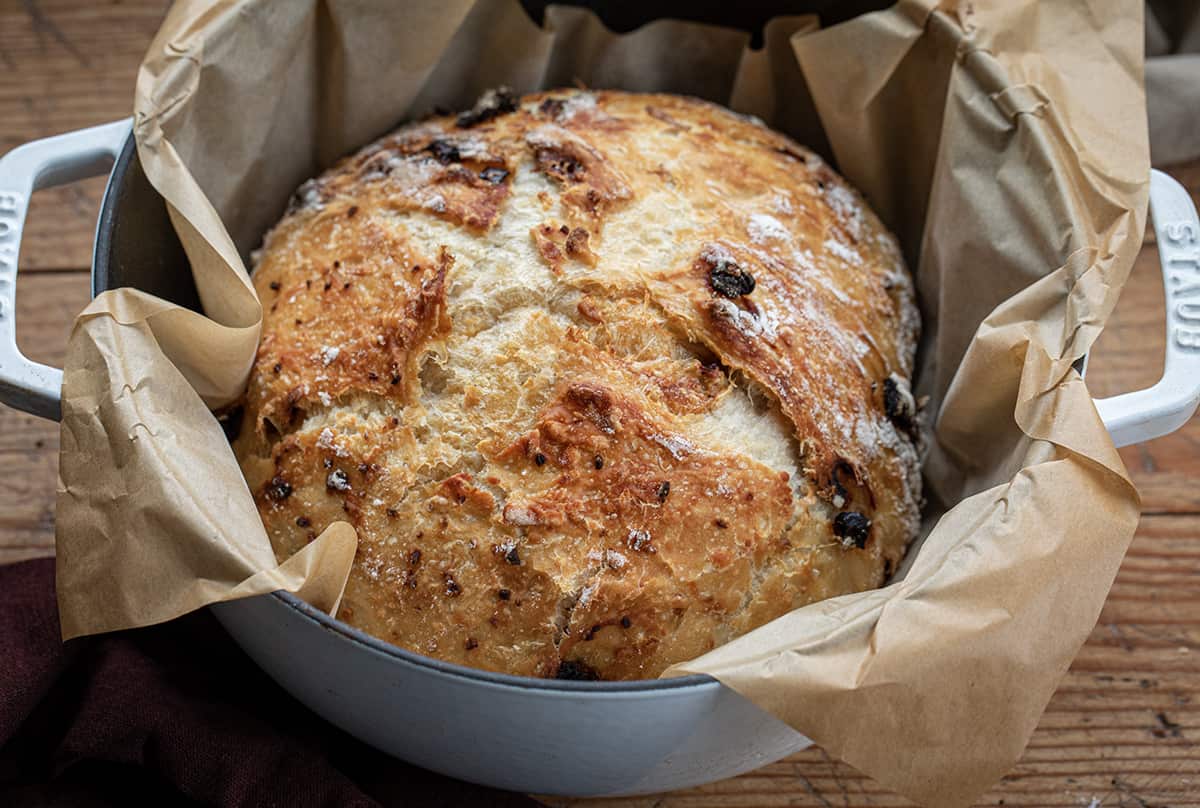
Sun-Dried Tomato Bread is a crusty, hearty bread made with sun-dried tomatoes, parmesan, asiago cheese, and garlic, baked to a golden brown. Think of sourdough bread, but no sourdough starter is needed! It is delicious on its own, with a slab of butter, or to load with your favorite sandwich fixings. Every time I walked past this loaf, I ripped off a piece to enjoy. It’s really that good! For another rustic bread recipe, try my Honey Oat Bread, too.
Ingredients & Substitutions
Flour: You will use 3 cups of all-purpose flour in this recipe. We have not tested this bread with other kinds of flour, so I can’t speak to their effectiveness.
Yeast: Use rapid-rise yeast, also known as instant yeast in this recipe. Rapid-rise yeast does not need to be bloomed first and can simply be mixed with the other dry ingredients. It is different than active dry yeast, which needs to be bloomed in warm water before use.
Sun-dried Tomatoes: When using dry-packed sun-dried tomatoes, be sure to soak them in water for about 30 minutes before draining, patting them dry, and chopping; this will soften them up. You could also use the sun-dried tomatoes packed in oil. Then, simply drain and chop before using.
Cheese: I love the hint of flavor you get from both the parmesan and asiago cheese. Plus, adding cheese enhances the texture of the bread. If you only have parmesan on hand, just substitute that for the asiago. Or, try using pecorino romano cheese instead. Substituting the cheeses may change the flavor a bit, but the bread will still be delicious!
Garlic: Just one teaspoon of minced garlic is all you need to add to the flavor profile of the bread.
Do I Have To Let The Dough Rise Overnight?
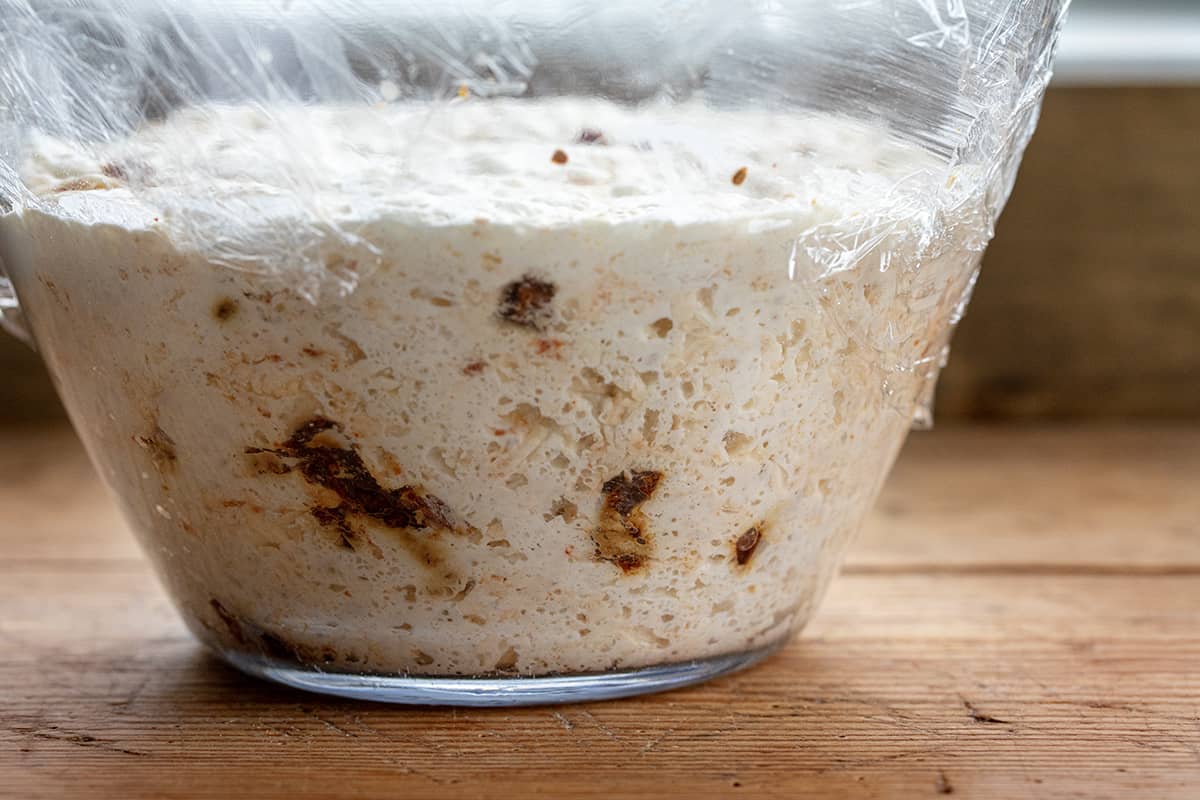
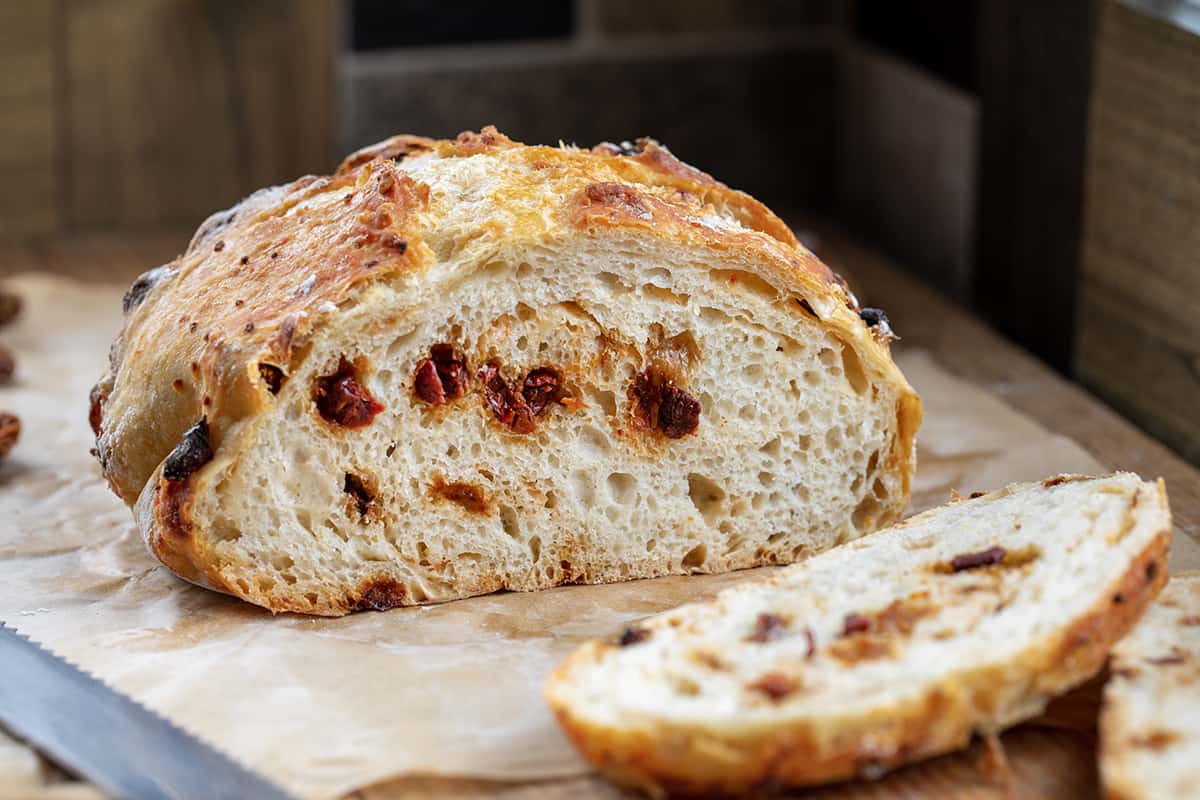
I would highly encourage you to let the sun-dried tomato bread dough rise overnight. Well, for 18 hours to be exact. Letting it rise at room temperature (no need to refrigerate) for this length of time resulted in a deeper flavor and more bubbles on the crust. The crumb was more like sourdough bread with large holes.
When I tested the bread after letting it rise for just 3 hours, the crumb was tighter, and the flavor wasn’t as developed, but it was still delicious. You can absolutely do a shorter rising time, just be aware that it won’t look like my images and won’t be as distinct in flavor.
Can I Make This Bread Without a Dutch Oven?
This bread really benefits from the Dutch oven, which helps give it that crusty top with a soft inside. (This recipe specifically calls for a Dutch oven for best results.) However, you could try making it in a different oven-safe pan. You could try a loaf pan, springform pan, or even make a freeform loaf on a sheet pan. But, you will need some sort of oven-safe lid to use. If using a different pan, you may have to adjust the baking time and the final results may differ.
How to Store Sun-Dried Tomato Bread
For bread you are going to eat right away, there are a few ways to keep it fresh as long as possible (up to a few days, anyway). Here are some tips for storing at room temperature:
- In addition to keeping the bread at room temperature (60°F to 80°F), keep the bread in a darker place, away from sunlight.
- When cutting a slice of bread, first, cut the loaf in half (yes, in the middle and not at the end). Then, when you cut a slice or two, you can put the two halves of bread back together, limiting exposure to a cut end.
- Wrap the loaf in plastic or aluminum foil.
- Enjoy it within 2-3 days. Otherwise, your best bet is to freeze the bread.
How to Freeze Bread
If you are not planning to enjoy the bread within a few days, freeze it! To freeze bread:
- Let the bread cool completely.
- Wrap the loaf (or portion of the loaf) in aluminum foil; then, store it in a sealed plastic bag.
- Place the bread in a colder part of the freezer, away from the door.
When ready to enjoy the bread, remove it from the freezer and unwrap it. Store it in a zipped plastic bag at room temperature. Or, to enjoy the bread right away, remove it from the plastic bag. Then, while still in the foil wrapping, heat it up in the oven for 10-15 minutes at 450°F.
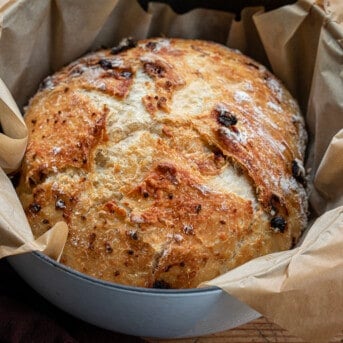
Sun-Dried Tomato Bread
Ingredients
- 3 cups (375 g) all-purpose flour
- 1 teaspoon kosher salt
- 1 teaspoon rapid-rise yeast
- 1 ½ cups water, room temperature
- ¼ cup sun-dried tomatoes, softened in hot water according to package instructions, drained, chopped
- ¼ cup (25 g) parmesan cheese, grated
- ¼ cup (25 g) asiago cheese, grated
- 1 teaspoon garlic, minced
Instructions
- In a large mixing bowl, combine flour, salt, and yeast. Whisk together until combined.
- Add water and mix until combined.
- Fold in the drained and chopped sun-dried tomatoes, parmesan, asiago, and garlic. Pour the mixture into a clean, greased bowl and cover with plastic. Let the dough rise at room temperature for 18 hours. The dough should be doubled in size. (See notes for alternative rising times.)
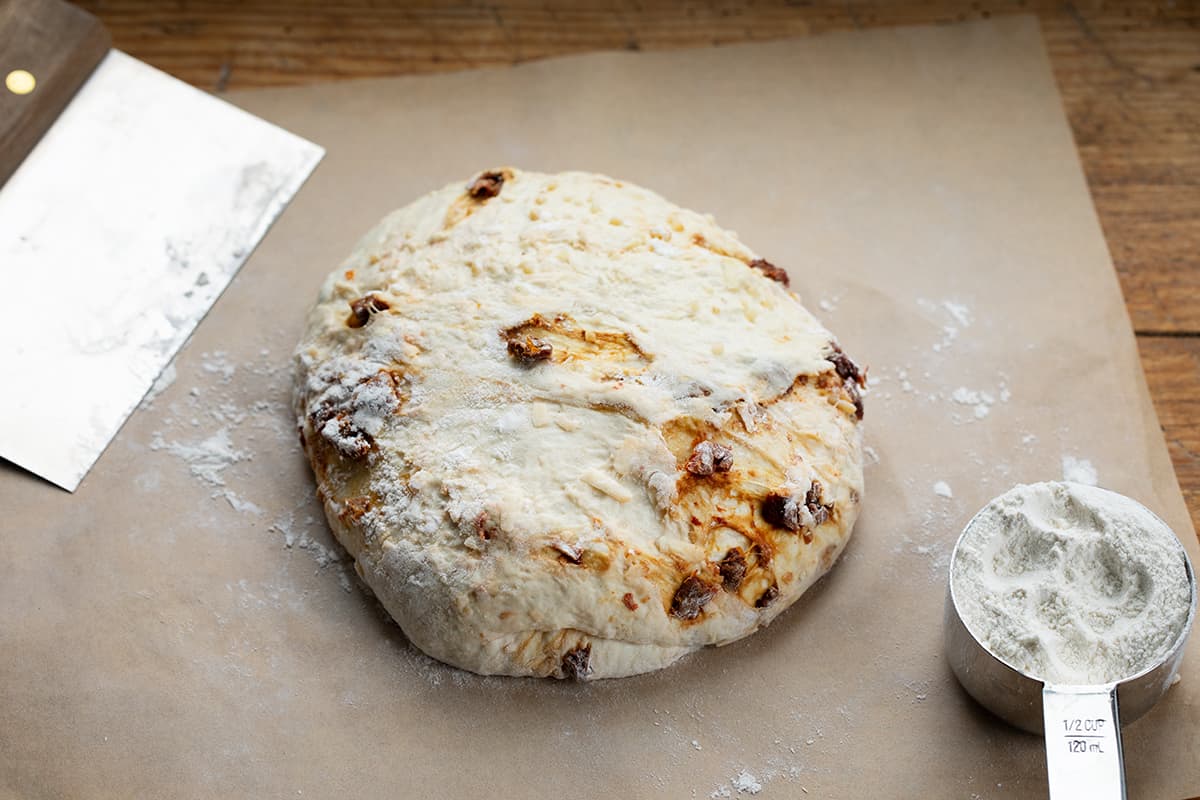
- When ready, place the dough onto a floured piece of parchment paper. Shape it into a ball by stretching and folding the dough over. Spray the dough with nonstick cooking spray before covering it with plastic. Let it rest for 30 minutes.
- Using a very sharp knife (like a paring knife or bread lame), score the top of the loaf with an “x”.
- Place a Dutch oven (I used a 4 quart) into a cold oven. Preheat the oven and pot to 450°F.
- Once preheated, carefully transfer the dough with the parchment paper to the hot Dutch oven. Cover and bake for 30 minutes.
- Uncover and continue to bake for 15 minutes, or until golden brown on top.
- Carefully remove the loaf from the Dutch oven and allow to cool for 30 minutes before slicing and serving.
Video
Notes
Did you make this recipe?
You can tag me at @iamhomesteader.
What the Test Kitchen had to say about this recipe:

Autumn
I love EVERYTHING about this bread! The texture was just perfect – soft and chewy on the inside with a crispy crust on the outside. But what really set this bread apart was the flavor. The sun-dried tomatoes added a touch of sweetness that was perfectly balanced with the savory cheese and garlic flavors. Good luck just having one slice!

Elizabeth
I have always loved bread and was hoping that this bread would live up to its (or my) expectations. Well, it went way above what I expected in both flavor and texture! The soft center with the crusty top had hints of the flavors of the sun-dried tomatoes and the cheeses in every bite. I could not stop grabbing a slice each time I went out to the kitchen.

Bella
I LOVE BREAD. I love THIS bread! The sun-dried tomatoes and sharp cheese go so well together in this recipe. The bread itself was perfectly soft inside with a crispy golden outer layer. I could honestly eat the whole loaf in 20 minutes. I suggest making this bread recipe!
We all have that perfect loaf of bread we remember from a restaurant or bakery that you love, but think you could never make… Guess what! This is that bread for me! There is a bakery in a small town near us that has the most wonderful, rustic, tasty breads that are usually sold out within hours of them opening in the morning. THIS IS that loaf of bread! AND I can make it! The hardest part will be waiting the full 18 hours for the rise time. (You don’t need to wait this long, but the difference in the finished product is worth the wait.) You will be so thrilled when your home smells so wonderful while it’s baking. I promise it’s THAT good. Enjoy!
This bread is so amazing. It is so easy to whip together and the possibilities for flavors are endless. We tried a 3 hour rise and an 18 hour one. While the 3 hour rise produced a decent loaf, the 18 hour rise produced a more traditional sourdough loaf with a super crusty crust and big holes inside. The flavor of the sweet tomatoes and hard cheeses were just sublime. Highly recommend everyone making this.


This recipe made beautiful bread but the dough was definitely way too wet which always seems to happen when I follow a recipe that uses the US cups for measurements instead of grams 😁 I added flour until it held together okay (which was quite a lot) and it was perfect.
Looks delicious…can it be baked in a Pampered Chef loaf pan ??
Thanks !!
Hi! I’m not sure, I don’t have one.
How much regular yeast would it take ??
I have to go away.Can I make this and let it raise overnight?
Huh?
Spot on. I used asiago, pecorino & fresh rosemary! I did as directed and everything was perfect. Good crunch on the crust and soft inside. I gotta walk away from it! Lol
Recipe was super wet and very gooey. Probably will not make again. Hopefully the bread turns out nice as it was impossible to handle let alone shape into a ball 🙁
HI C-
Did you finish baking? Do you happen to be in a humid climate? If you ever have a dough that is overly wet and doesn’t appear like described or in the images, you could add a bit more flour. Hope that helps!
So irritated. I made three loafs. All three super gooey so I added more flour. Just done done baking as they’re gooey inside. I’ve never had an issue with underbaking, I usually burn them.
I’m adding black olives too.
why is my bread dough so sticky? I followed the recipe exactly
Is it exceptionally humid where you are? You may need a touch more flour.
This is my favorite bread recipe and I’ve made it multiple times. Thank you for satisfying my bread cravings Amanda!
So glad you like it!!
I guess I will try making it with gluten free flour, as I got no answer from you
Could I make this with gluten free flour