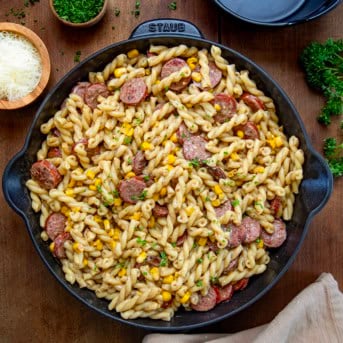
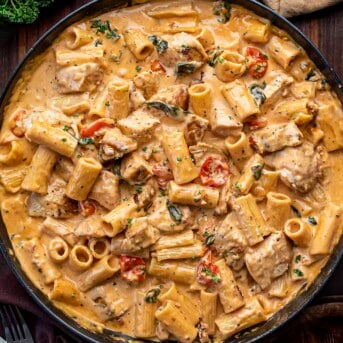
Roasted Garlic Ravioli is cheese-filled ravioli topped with a rich cream sauce made with oven-roasted garlic and fresh spinach. If you love roasted garlic, be sure to try my Cajun Chicken with Roasted Garlic Alfredo and Creamy Roasted Garlic & Mushroom Pasta, too.

Roasted Garlic Ravioli
Oven-roasted garlic adds lots of flavor to the cream sauce in this recipe. It’s easy to roast garlic and it adds so much more depth to the dish. If you are really feeling motivated, you can make your own ravioli! Find the recipe in my Homemade Five-Cheese Ravioli with Garlic Brown Butter Sauce. Otherwise, storebought, cheese-filled ravioli works great, too.

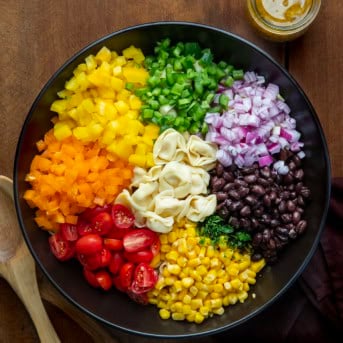
Ravioli Ingredients
There are two parts to this recipe–the roasted garlic and the cream sauce.
Garlic: You will need one head of garlic for the roasted garlic; this is approximately 10-12 cloves.
Ravioli: Cook the cheese-filled ravioli according to package instructions. You could also try different varieties of ravioli if you prefer.
Spinach: I used fresh spinach in the sauce; you could also use frozen spinach and simply let it heat through when you add it to the sauce.

How to Roast Garlic
The first thing you will want to do for this recipe is to roast the garlic. It is so easy and it smells (and tastes) amazing! All you need are a head of garlic and a square of aluminum foil. Preheat the oven to 400°F as you prepare the garlic.
To roast the garlic, use your fingers to peel away all the loose, papery, outer layers around the head of garlic. Leave the head itself intact with all the cloves connected. Trim about 1/4 inch off the top of the head of garlic, exposing the cloves inside. Drizzle with a teaspoon of olive oil, letting the oil saturate the cloves. Wrap it up in the square of aluminum foil and bake for 50-60 minutes.
Note: Cooking time will depend on the age of the garlic. Garlic is done cooking when the center clove is soft. Once slightly cooled, the cloves should be tender and should easily pop out of the paper.
When done, remove the garlic from the oven, open the sealed aluminum foil packet and let it cool a bit. Once cool enough to touch, squeeze out the cloves and discard the remaining skin. Place the garlic in a small bowl and mash it with a fork until it forms a paste. Set it aside.

How to Make Roasted Garlic Ravioli
When the garlic has been roasted and mashed and the cheese-filled ravioli has been cooked, it’s time to put everything together in the cream sauce. To make the sauce, first, brown the butter. The process of browning butter includes slowly heating butter in a saucepan until it starts to bubble. Then, whisk vigorously until the bubbles create a foam and eventually turn golden brown.
After browning the butter, add the mashed garlic, heavy cream, salt, pepper, and parmesan cheese. Whisk to combine. Meanwhile, in a small bowl, combine the flour and heavy cream until there are no lumps. Pour this mixture into the sauce. Simmer, whisking constantly, for 3-5 minutes. Add the spinach and simmer an additional 3-5 minutes. Finally, add the cooked ravioli to the skillet and toss to coat. Serve hot with a side of breadsticks and roasted asparagus.

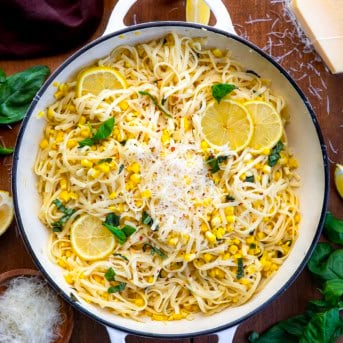
More Pasta Dishes

Roasted Garlic Ravioli
Ingredients
Roasted Garlic
- 1 head garlic, approximately 10-12 cloves
- 1 teaspoon olive oil
Roasted Garlic Ravioli
- 1 pound cheese-filled ravioli, cooked according to package instructions
- 6 tablespoons unsalted butter
- 1¾ cups heavy cream
- ½ teaspoon kosher salt
- ½ teaspoon ground pepper
- 1 cup parmesan cheese, grated
- 1 cup spinach
- salt and pepper, to taste
Flour Slurry
- 2 teaspoons all-purpose flour
- 1 tablespoon heavy cream
Instructions
Roasted Garlic
- Preheat the oven to 400°F.
- Use your fingers to peel away all the loose, papery, outer layers around the head of garlic. (Leave the head itself intact with all the cloves connected.)
- Trim about ¼ inch off the top of the head of garlic, exposing the cloves inside.
- Place garlic in the center of a 6-inch square of aluminum foil.
- Drizzle with olive oil, letting the oil saturate the cloves.
- Fold the sides of the aluminum foil up to the center and seal (creating a foil packet with the garlic inside). Bake for 50-60 minutes, or until the garlic cloves are soft and deep golden brown.
- Remove the garlic from the oven and carefully open the sealed foil packet to allow the garlic to cool slightly. Once it is cool enough to touch, use your fingers to squeeze out the cloves. Discard the remaining skin.
- Place the roasted garlic cloves in a bowl and use a fork to smash the garlic; set it aside.
Roasted Garlic Ravioli
- In a medium, nonstick skillet over medium heat, melt the butter. Once the butter bubbles (1-2 minutes), begin whisking occasionally to prevent it from bubbling over. Once the butter foams, whisk vigorously until golden brown bits form (5-6 minutes).
- To the browned butter, add the mashed garlic, heavy cream, salt, pepper, and parmesan. Whisk to combine.
- In a small bowl combine the flour and heavy cream until no lumps are visible and pour the slurry into the sauce. Simmer, whisking constantly, until thickened (3-5 minutes).
- Add spinach and stir until wilted (3-5 minutes).
- Add cooked ravioli to the skillet and toss to coat.
- Serve hot.
Did you make this recipe?
You can tag me at @iamhomesteader.
Not sure where I went wrong, I feel like I was rendering the fat out of the cream. I removed more than the 6tbsp back of melted butter out of the mix with a spoon and still had lots of oil pooling in the pan. Clearly user error!
This looks so good
My family adores this recipe. I’ve also made it with penne and added mushrooms. So good!
Suupppeeerrr good! I used 2 heads of garlic (cause I’m a garlic fiend) and added sun dried tomatoes. Everyone loved ot, and can always appreciate a house that smells of roasted garlic 🤤🤤
Made this tonight and it was outstanding. My husband doesn’t like parmesan cheese so I omitted it, leaving the sauce a tiny bit bland – if you do that you’ll need more salt. But I sprinkled parmesan on my portion and it was perfect. And a side benefit – my entire house smells like roasted garlic!
Was absolutely delicious! In the recipe it says to “pour flour slurry into mixture” & I had to laugh because there is no way that the 2tsp of flour & 1T of heavy cream makes a pouring texture, it was definitely a thick paste, I was nervous I did it wrong but it was exactly as it stated in the recipe, it still worked well & it tasted so yummy! I used spinach & cheese ravioli so I omitted the spinach. Other comments said that 6T was too much butter & that it pooled, however, I didn’t have that issue at all, it all mixed in very well & was a nice thick sauce that tossed perfectly with the ravioli.
Made it today. My husband raved over it. It was delicious! I used only 2 tbs of butter and a little olive oil. Next time, I will add fresh mushrooms in addition to spinach.
Made this tonight, used Italian sausage ravioli and added fresh mushrooms. I highly recommend this recipe, was very delicious and easy to prepare.
It was delicious! The ravioli was okay, but, man, that sauce was the best part! You could put that sauce on just about anything except fish. I would even dip some nice crusty Italian bread in it.
This was delicious with the exact amount of garlic. Would definitely recommend.
Sounds wonderful… would have to sub yogurt and a bit of water for heavy cream. My other is intolerant of milk… but the yogurt making process changes something in the lactose, sour cream in moderation, yogurt (Greek) not a problem.
Made it today. Turned out so good. This sauce is so yum.
Looks great and so easy to make.
This is an Amazing recipe I encourage others to try it
Can I use regular milk instead of Heavy Cream?
I enjoyed this but will definitely add more roasted garlic. It was very subtle with just one head of garlic. Delicious none the less!
That’s good feedback, thank you!
DO NOT USE 6TBS OF BUTTER, WAAAAYYYY TOO MUCH. It was pooling so much I actually wanted to strain the sauce. Tasty regardless though
This is amazing! I didn’t have ravioli so I substituted tortellini and added some fresh mushrooms to the sauce. I’ll definitely be making this again.