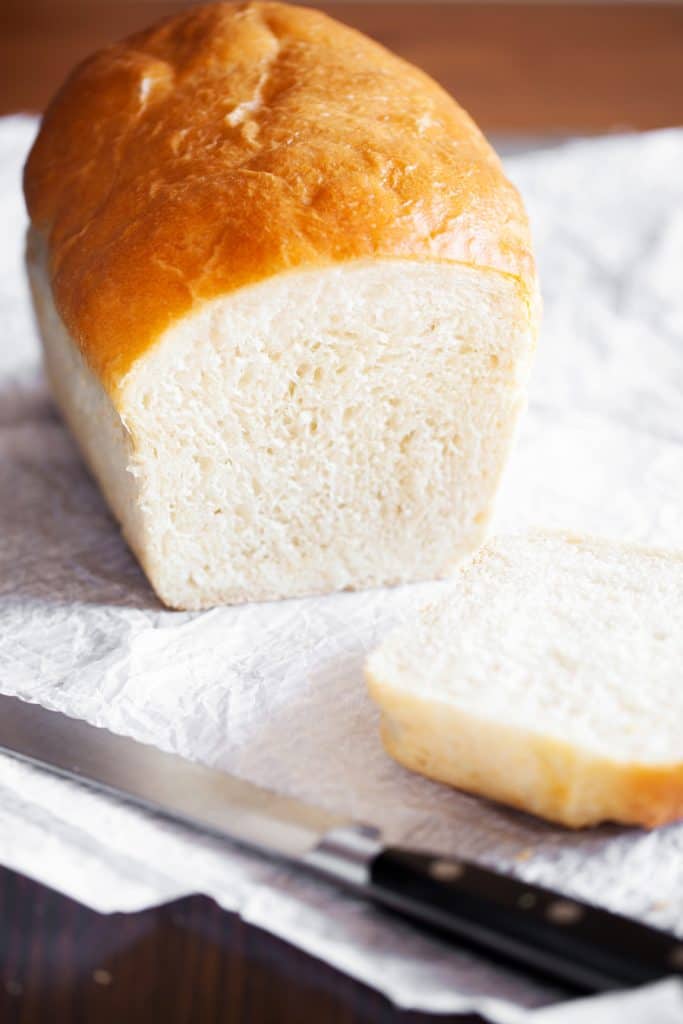
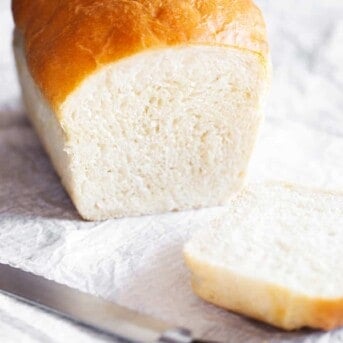
Soft and fluffy Amish white bread, perfect for your everyday bread needs. Slice thin for sandwiches or thick for French toast. Give Amish white bread a try and never buy store-bought again!
How to Make Amish White Bread
In a small bowl, stir the water, sugar, and yeast. Let it sit for 5-10 minutes, or until bubbles form. The bubbles indicated that the yeast is active. If you do NOT see any bubbles, the yeast may be dead and you will want to stop and get new yeast.
Using your stand mixer (this is not Amish per se, but is an easy convenience that will save time!) fitted with the dough hook attachment, add the flour, salt, and oil. Pour the activated yeast mixture on top and turn the mixer on to medium-low (setting 2 on my stand mixer) and allow the bread dough to come together. This can take up to 10 minutes.
Remove dough from the mixer bowl, roll tightly, and set into a greased bowl to rise for about an hour. It should double in size.
After the hour, punch the dough down and then move to a greased 9×5 loaf pan. Let rest for another hour or so.
When you are ready to bake, heat the oven to 350°F. Bake for 25-30 minutes, or until bread is golden brown and when tapped with a finger, sounds hallow.
Remove bread from the oven, brush with melted butter, and then let it rest for 10 minutes. (That’s important!)
Then enjoy!
AMISH WHITE BREAD
Ingredients
- 1 cup warm water, 110-120°F
- ⅓ Cups granulated sugar
- 1 packet, 2 ¼ teaspoons instant yeast
- 3 cups all purpose flour
- ¾ teaspoons salt
- 2 tablespoons vegetable or canola oil
- 2 tablespoons unsalted butter, melted
Instructions
- In a small bowl, stir together the water, sugar, and yeast. Let sit for 10 minutes, until bubbles form.
- In the bowl of a stand mixer fitted with the dough hook attachment, add the flour, salt, and oil. Pour in the yeast mixture. Turn the mixer to medium and allow to knead until the dough no longer sticks to the sides of the bowl, about 10 minutes.
- Roll into a tight ball and transfer to a greased bowl. Cover loosely with plastic wrap and let rise in a dark, warm, draft free place for 60 to 90 minutes, until doubled in size.
- Deflate and shape into a log to fit in a 9x5 loaf pan. Cover loosely with plastic wrap and let rise in a dark, warm, draft free place for 50 to 60 minutes, until doubled in size.
- Preheat the oven to 350°F about 20 minutes before the second rise is done.
- Bake for 25 to 30 minutes, until golden brown.
- Brush the crust with melted butter and let cool for 10 minutes in the pan.
- Remove loaf from pan and transfer to a cooling rack to cool completely
Did you make this recipe?
You can tag me at @iamhomesteader.
Photography by The PKP Way.


Delicious and so easy to make! the instructions are wonderful. My boys love it as is but I cut the sugar in half the second time as it is a sweeter bread.
I’ve made this recipe a couple times and this most recent time I tweaked it a little and I LOVE it! I swapped out the sugar for 4 Tbsp of honey, I swapped out the water for milk, and I added about 2 Tbsp of softened butter to the dough as it was mixing. I did have to add about a 1/4 more flour but it turned out perfect and super pillowy and soft!
Made this today and it was delicious. I was wondering if I can leave the dough out overnight?
This bread is so easy and is incredibly tasty! Our favorite!
Would I double this recipe for a 13×5?
You should just make 2 loaves.
This has been my favorite recipe so far. It makes perfect bread. With my oven, I do have to cook it longer.
Question. Do I have to add that much sugar? Would it bother the bread with less sugar?
I have tried this recipe twice in the past two days. It takes forever to rise. The full 90 minutes for the first rise and then it needs over an hr to double in size. I sit it covered in the oven with the light on. Is it maybe getting too warm in there? Thanks!
Thanks for trying out my Amish White Bread recipe! It’s not uncommon for rising times to vary a bit due to factors like room temperature and humidity. Using your oven with the light on is a good approach to create a warm, draft-free environment, but it might be getting a tad too warm. You could try turning the oven light off after the initial rise to prevent it from getting too hot. Also, make sure your yeast is fresh and active as that can affect the rising process. If you’re still experiencing long rising times, you can increase the amount of yeast slightly or try using slightly warmer water (around 120°F) to activate the yeast more effectively. Happy baking!
Hi! I was wondering if it’d be possible to make this using sourdough starter instead of instant yeast. Any idea what measurements I’d use?
This was easy to make and it was delicious!
Just pulled my loaf out of the oven not long ago and it’s seriously delicious!! I need to make a few tweaks myself Which would be using old yeast so the dough didn’t rise as much. I also will use a better quality flour.
My question for you would be, if I wanted to add in some sourdough….what tweaks would I make and how much sourdough?
I made this bread today, weather is cold and wet. Followed directions as written letting the dough rise in a cold oven each time. This bread was so delicious. Was wondering if you could make several loaves and freeze them.
This recipe is great! Every other sandwich bread recipe has been too crumbly. I hand mixed and let mine rise for a few hours due to my cold house. It tastes great, has great hold and fluff and was super easy. I will definitely be using this all the time!
Easy and delicious! I’ve tried several different bread recipes so we could have homemade bread for the family, but this one is the best blend of simplicity, great texture and mouthwatering flavor.
Made this exactly as recipe. Doughy on inside after cooling. Don’t wast you ingredients.
Thats an oven issue. It needs to bake longer. This recipe has been made for over a century with rave reviews.
Then you need to bake the bread a little longer or let it cool completely. I make this bread regularly and it’s perfect every time.
I use a thermometer. It needs to have an internal temp of 190 degrees Fahrenheit .
Hi – do you scoop the flour with the cup measure or spoon it into the cup measure and scrape off the excess? Trying the recipe for the first time. Thanks!
It’s perfect and my kids go nuts for it. I make this one every couple of weeks! Thank you!
I’ve been making this for awhile now. No longer buy store bought, stick to your teeth bread. Started making my own when I noticed that bread now lasts on the counter for 3+ weeks. Don’t trust that! What are they putting in it to make it last so long?
I did this recipe, is very good, thanks, very soft and fluffy my bread. Thank you. Soft and delicious, and we almost finish. I don’t have money for pay for recipes, always searching for free and good recipes.
Hi – made bread yesterday – it was great – making again today – but my dough stops sticking to sides after only like 2 minutes on a lower speed – should I still knead it for @ 10 minutes ??
Thanks so much !
It’s great to hear that you enjoyed making bread! If your dough is no longer sticking to the sides after only 2 minutes on a lower speed, that’s perfectly fine. The kneading time can vary based on factors like humidity, flour type, and mixer speed.
Since your dough has come together nicely and is no longer sticking, you can go ahead and reduce the kneading time. It’s important to knead just until the dough becomes smooth and elastic, so if it’s achieved in 2 minutes, that’s absolutely okay. Over-kneading can lead to a denser texture, so you’re on the right track!
Enjoy making your bread today, and I hope it turns out just as great as the previous batch. If you have any more questions or need further assistance, feel free to ask!
Please, I wish there were no ads. Could you do something about it? Thanks.
Oh of course! Happy to. In order to offset the cost of groceries, time, and the talents involved in recipe testing and publication of, I can charge you the low price of $59.99 a month for access to my recipe library! Or, you can scroll your finger and enjoy your free tested recipes. Just let me know what you decide! 🙂
I unfortunately do not have a stand mixer, can I just use my hands and how long would I knead my bread? Thanks!
Easier bread I’ve ever made! It’s soft, and delicious. My kids love it! Thank you for sharing! ♥️
I tried it, and the dough was extremely sticky. What did I do wrong?
I would add a tiny bit more vegetable oil and knead for longer