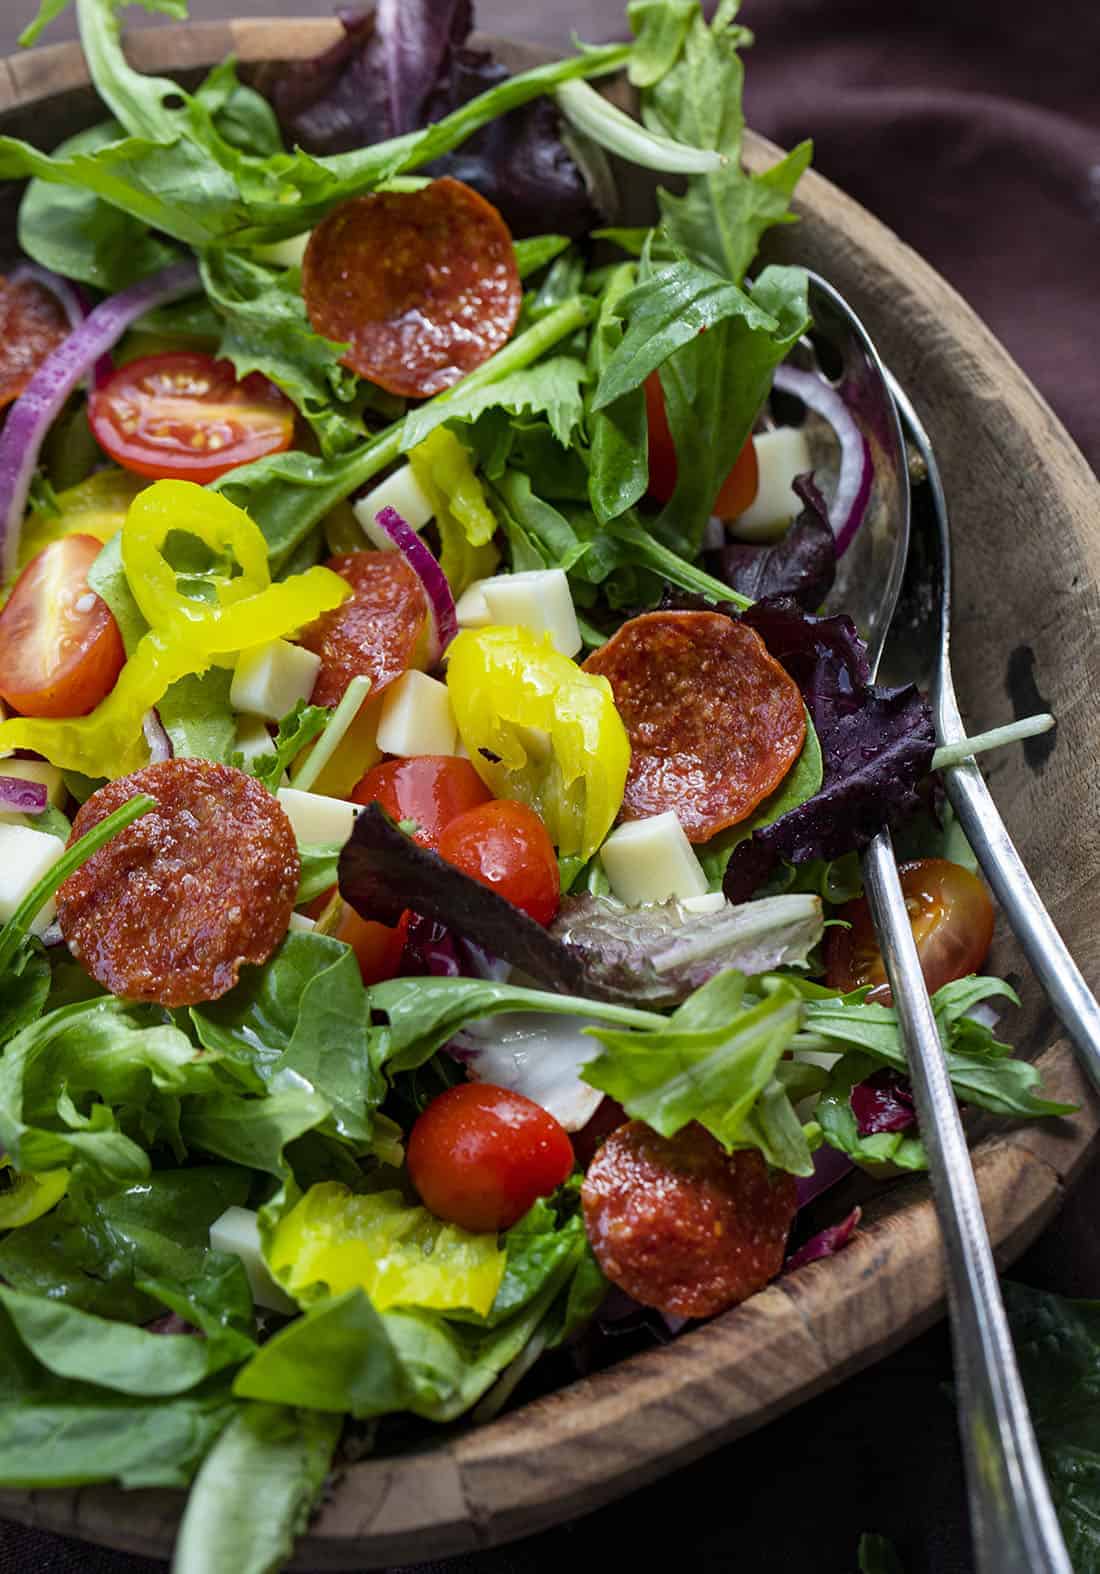
Pepperoni Salad is a lettuce salad made with a pile of spring mix that is topped with tomatoes, mozzarella cheese, banana peppers, red onions, and fried pepperoni slices. Try my Watermelon Salad for another flavorful salad.
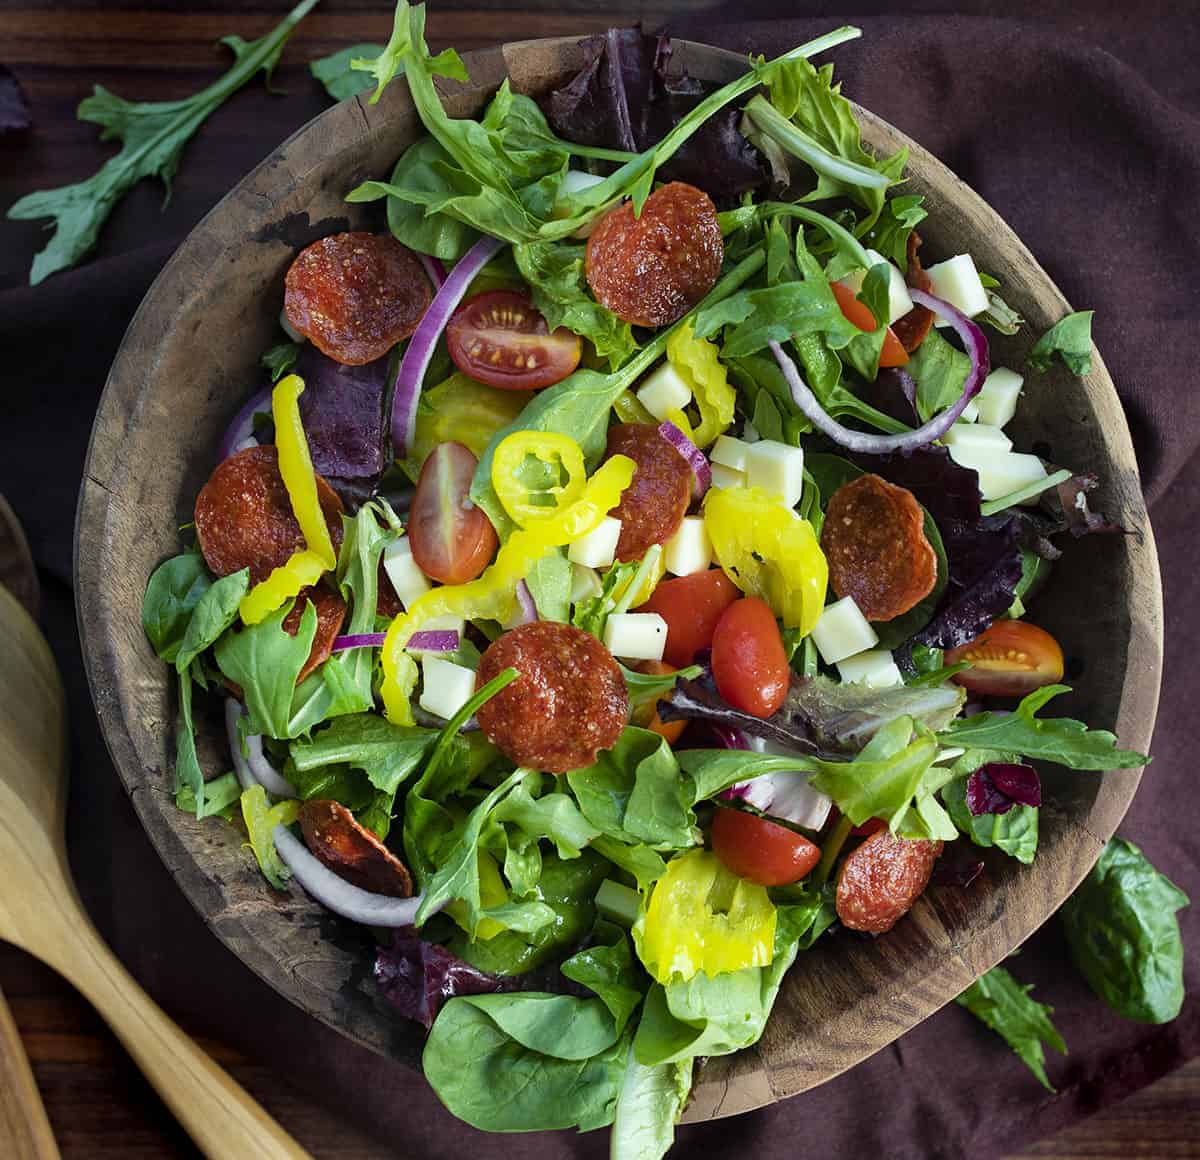
Pepperoni Salad
Pepperoni isn’t just for pizza; it is delicious on this pepperoni salad! The pepperoni slices are fried in oil for a crispy crunch to each delicious bite. And, the best part is you really don’t need any dressing on the salad. After the ingredients are mixed together, you get the juices from the ingredients that act as a dressing. However, I like to add a little extra juice from the jar of banana pepper rings or Italian dressing.
Pepperoni Salad Ingredients
Pepperoni: I used half of a six-ounce bag of pepperoni slices in this recipe. However, you may want to fry the entire bag of pepperoni after you realize how addicting they are to munch on as a snack! If you don’t want to fry the pepperoni, I will let you know how to bake it in the oven. Or, you can simply add the pepperoni slices as-is (no frying or baking).
Greens: A bag of spring mix was my lettuce of choice for the salad. It adds some color and variety to the bowl. You can use the greens that you have on hand or prefer.
Cheese: At first, I thought about using the mozzarella pearls (balls) of cheese. But, instead, I cut up half a block of mozzarella cheese into cubes. I actually think that worked better for this salad.
Peppers: I chose a jar of mild banana pepper rings to add to the salad. The juice from the peppers is the perfect complement (and dressing) to the salad.
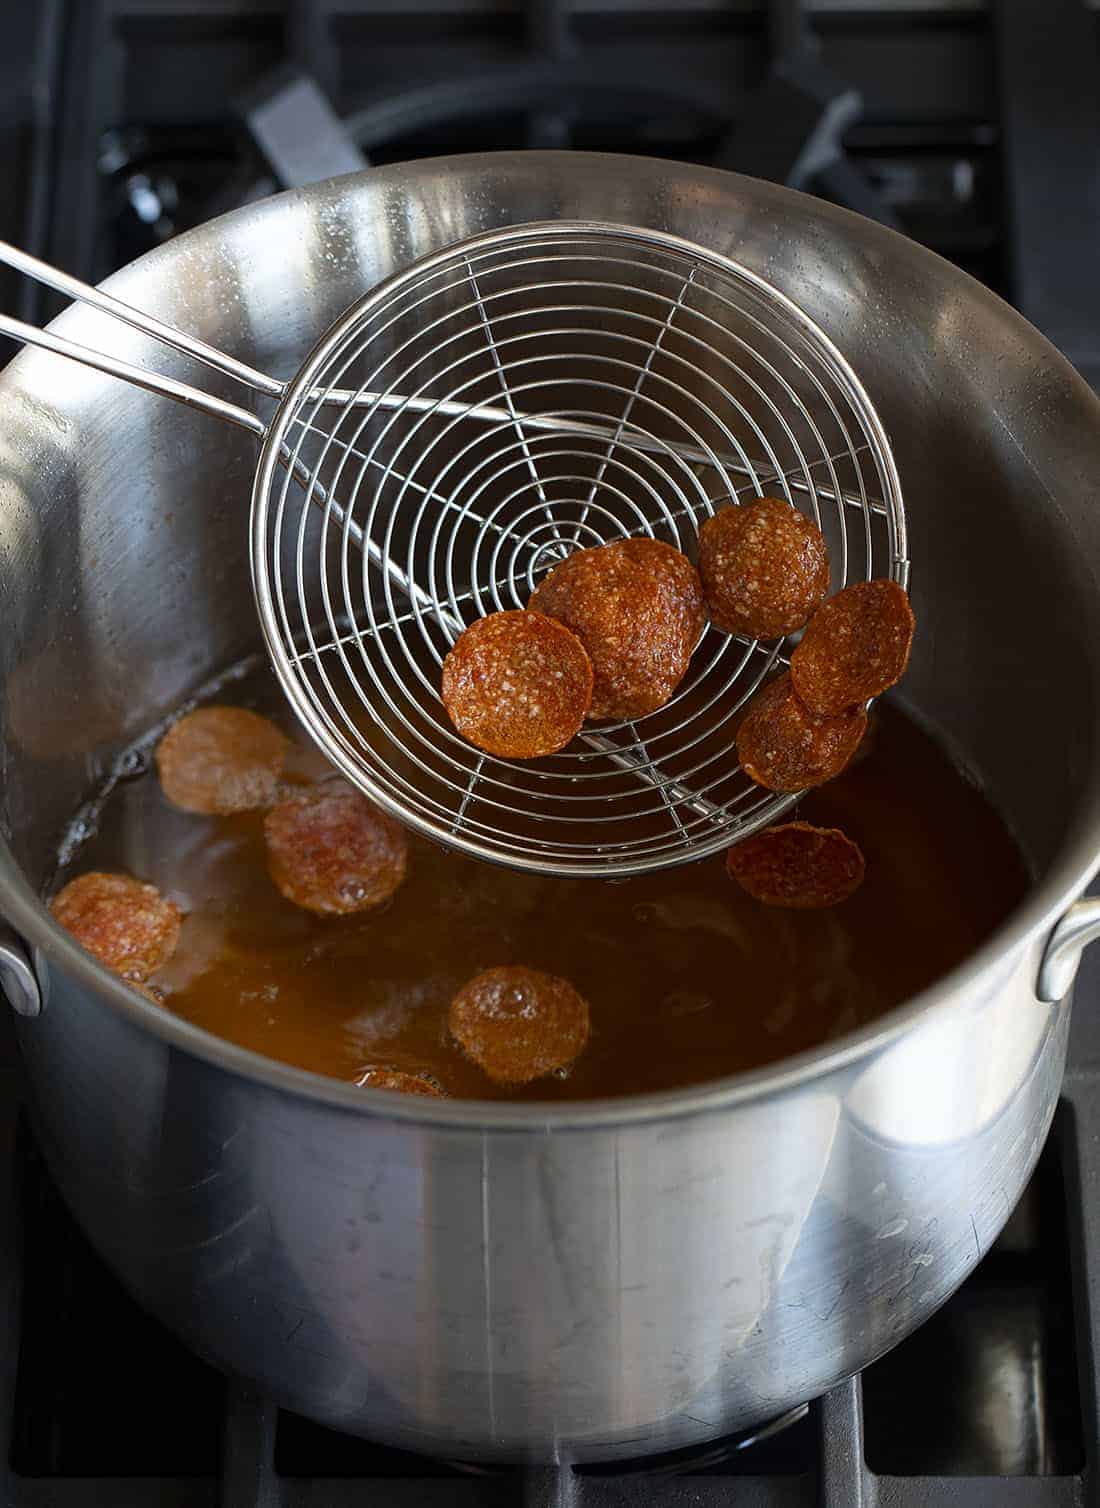
Frying Pepperoni Slices
Frying the slices of pepperoni gives this salad a delicious crunch. And, I am going to warn you now, even though this recipe only calls for using half of a 6-ounce bag of pepperoni slices, you may want to fry the entire bag. They are so good as a snack; if I would have made only half the bag, I would not have had any left to add to the salad😊 .
To fry the pepperoni, first, heat up the oil over medium-low heat until the oil reaches a temperature of 350°F-375°F. Use a candy thermometer or deep-fry thermometer to check the temperature. If you don’t have a thermometer, it usually takes 12-15 minutes for the oil to reach a temperature of 350°F. You can always try a few testing methods as well:
- One method to test the oil temperature is to put the handle of a wooden spoon into the hot oil. The oil will start to bubble steadily when it’s good to go. If you are seeing the oil bubbling like crazy, it’s too hot and needs to cool down a bit. If there are only a few to no bubbles, it’s not hot enough.
- Another method is using a 1-inch square of bread. Carefully put the bread into the oil and if it browns in 60 seconds, the oil is ready.
- My favorite method is the popcorn test. Put a kernel of popcorn into the pan of oil as soon as you begin heating up the oil. As soon as that kernel pops, the oil is ready!
When ready, work in batches to fry the pepperoni. This is to keep the pepperoni from sticking together. Fry the slices for about 2 1/2 minutes. Then, use a metal slotted spoon or spider strainer to remove the pepperoni from the oil. Set them on a paper towel-lined plate to cool. Repeat with the remaining pepperoni.
Please note: After each batch of pepperoni has been fried, the oil temperature may go down. So, be sure to check that it is hot enough for each batch before adding more slices. These can be stored in an airtight container for 1-2 days.
Can I Bake the Pepperoni in the Oven?
Yes! If you don’t want to fry the pepperoni slices in oil, you can bake them in the oven. They will not get quite as crispy, but they will still add a bit of crunch. To bake them in the oven, place the pepperoni in a single layer on a baking sheet lined with parchment paper. Bake at 375°F for 10 minutes. Then, blot away the grease on the pepperoni slices. Bake an additional 4-5 minutes, or until crispy.
How to Make Pepperoni Salad
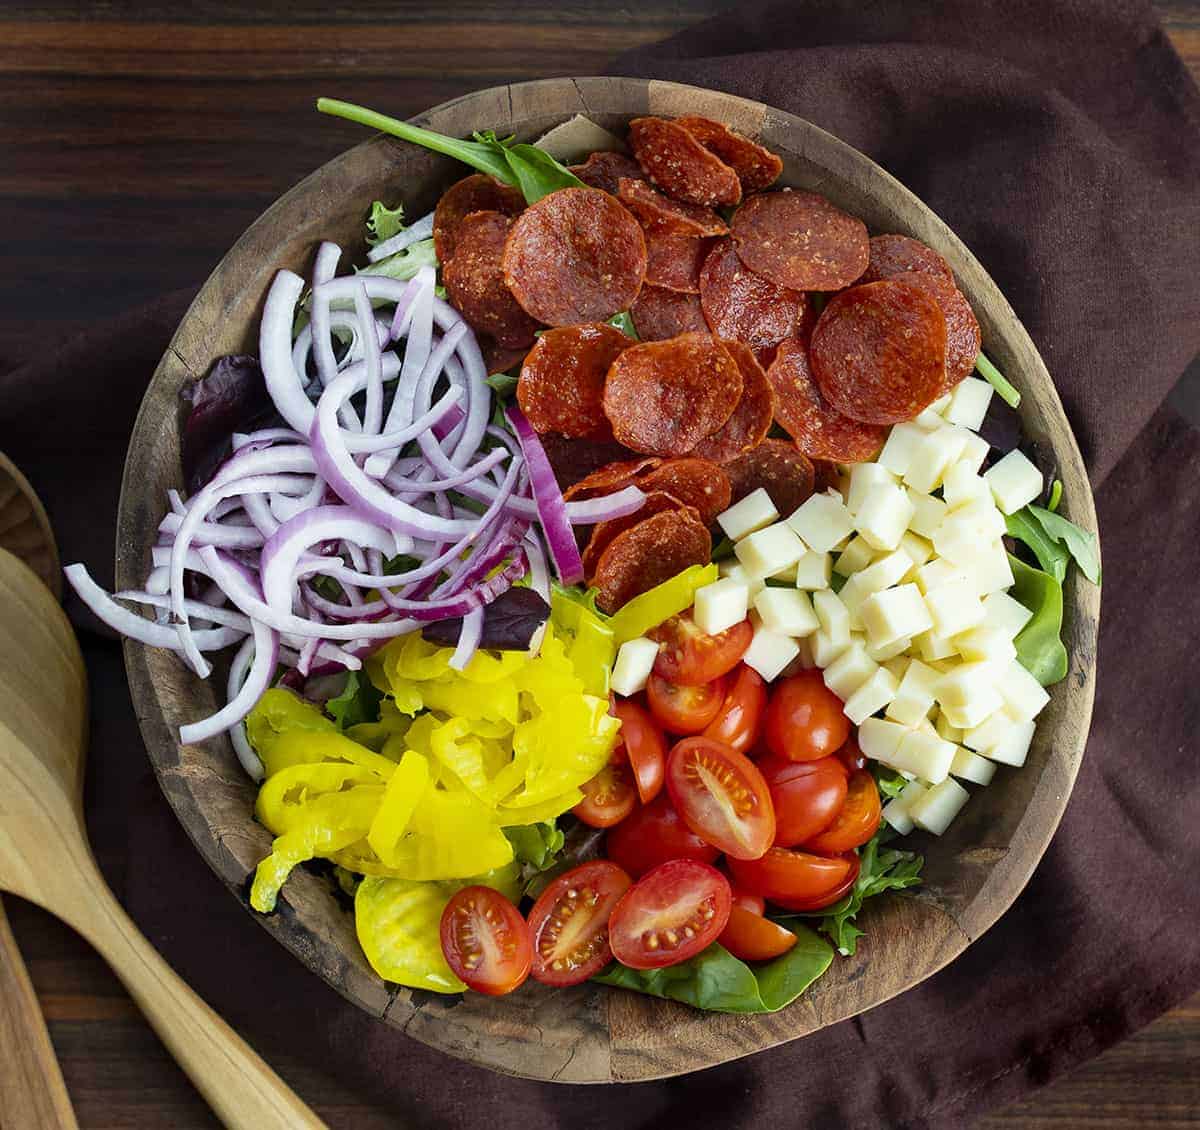
Once the pepperoni has been fried, it’s time to assemble the salad to enjoy! First, add the spring mix to a bowl. Then, top with tomatoes, mozzarella cheese, banana pepper rings, red onions, and fried pepperoni slices. If you let the salad sit for a few minutes to soak up the juices from the ingredients, you may not need or want to add any dressing.
If you want to add dressing, you can add some juice from the jar of banana peppers. Italian dressing also works well with the salad. Serve with a side of breadsticks for a lighter lunch. Or, serve the salad as a starter for your main course. This salad would also be a wonderful salad to share at a potluck.
More Delicious Salads
Pepperoni Salad
Ingredients
Pepperoni
- 3 ounces pepperoni slices, half of a 6-ounce bag
- vegetable or canola oil, for frying
Salad
- 1 bag (8 ounces) spring mix
- 1 cup grape tomatoes, halved
- 4 ounces mozzarella cheese, cubed (approximately 1 cup)
- ½ cup banana pepper rings, mild
- ½ red onion, cut into halved rings
- 1-2 tablespoons juice from jar of banana peppers, optional, for dressing*
- Italian dressing, optional, for dressing*
Instructions
Pepperoni
- Add about 2 inches of oil to a large pot.
- Heat the oil over medium-low heat until the oil reaches 350°F-375°F on a candy thermometer or deep-fry thermometer.
- Working in batches (so they don't stick together) add pepperoni slices to the hot oil. Cook for about 2½ minutes, or until crispy.
- Using a spider strainer or metal slotted spoon, remove the fried pepperoni and place on a plate lined with paper towel.
- Repeat with the remaining pepperoni, making sure the oil is hot enough for each batch. (The oil temperature may go down after cooking each batch of pepperoni.)
- Set fried pepperoni aside until ready to assemble salad. (They will stay crispy for 1-2 days when stored in an airtight container.)
Salad Assembly
- To a large mixing bowl, add spring mix.
- To the spring mix, add cherry tomatoes, mozzarella cheese, banana pepper rings, red onions, and fried pepperoni slices.
- Serve topped with juice from the jar of banana peppers or Italian dressing. (Start with less dressing you think you would need; you can always add more.) *See notes.
Notes
Did you make this recipe?
You can tag me at @iamhomesteader.

